Add Device to labs
- Windows
- Linux
- Mac
After installation and Login , navigate to the ‘Connectivity’ tab within SNA Labs and select ‘My Devices’. Here, you’ll add your device and configure WireGuard with a public key provided by the platform. This step is essential for establishing a secure, encrypted connection.

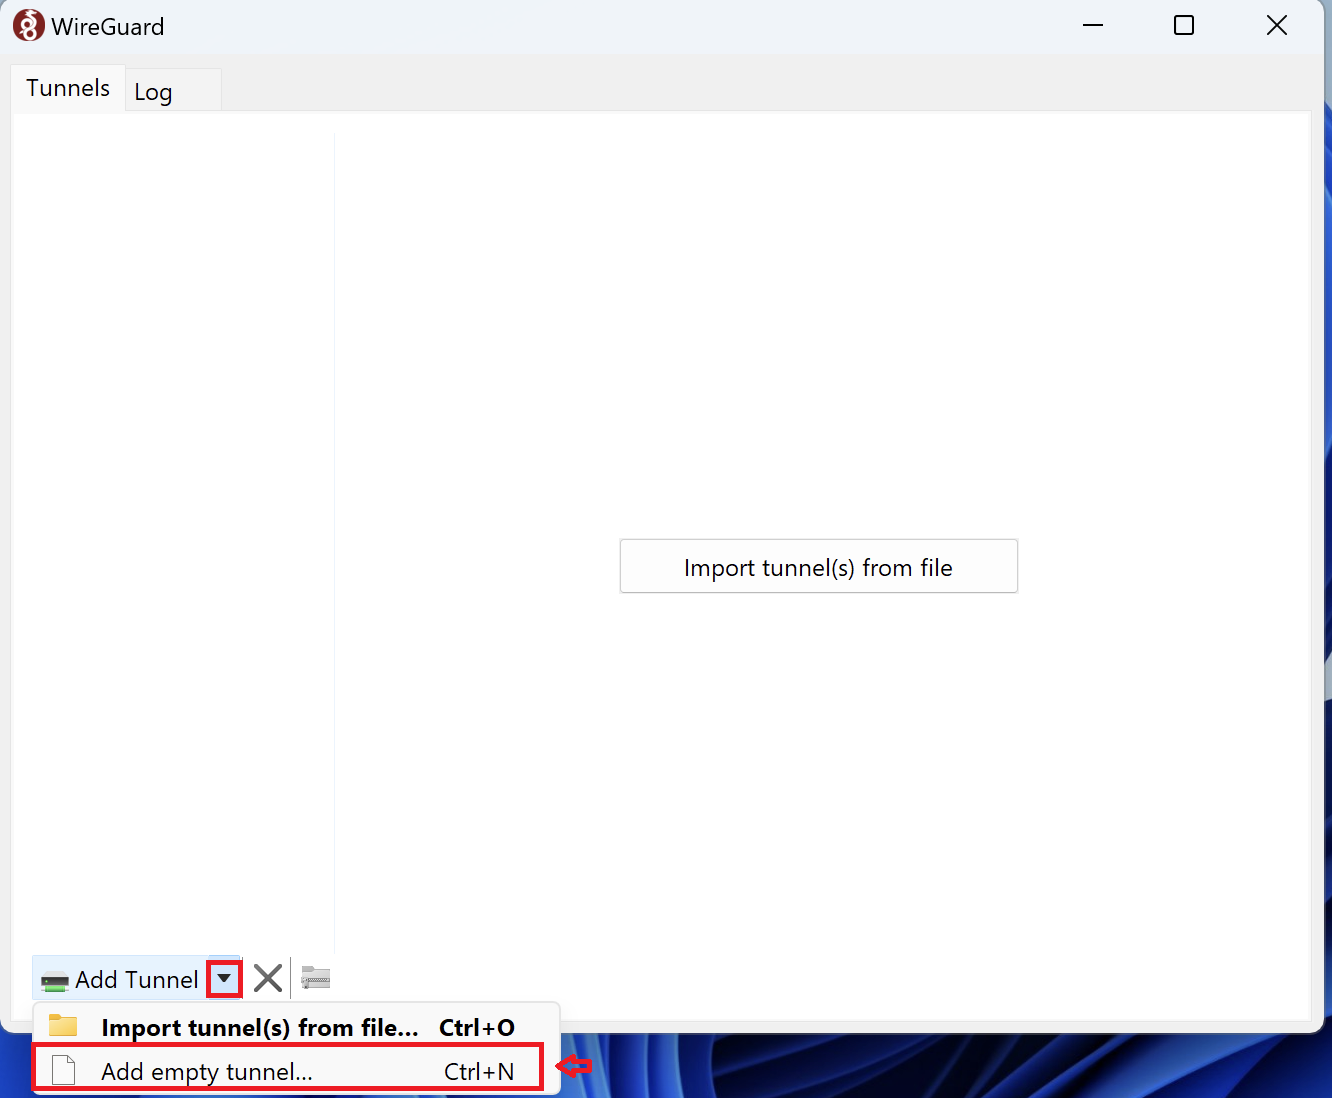
Begin by opening the WireGuard application on your Windows. Look for the ‘+’ symbol within the app's interface, which signifies the option to add a new connection. Click on ‘Add an empty tunnel’ to start configuring a new secure tunnel for your connection.
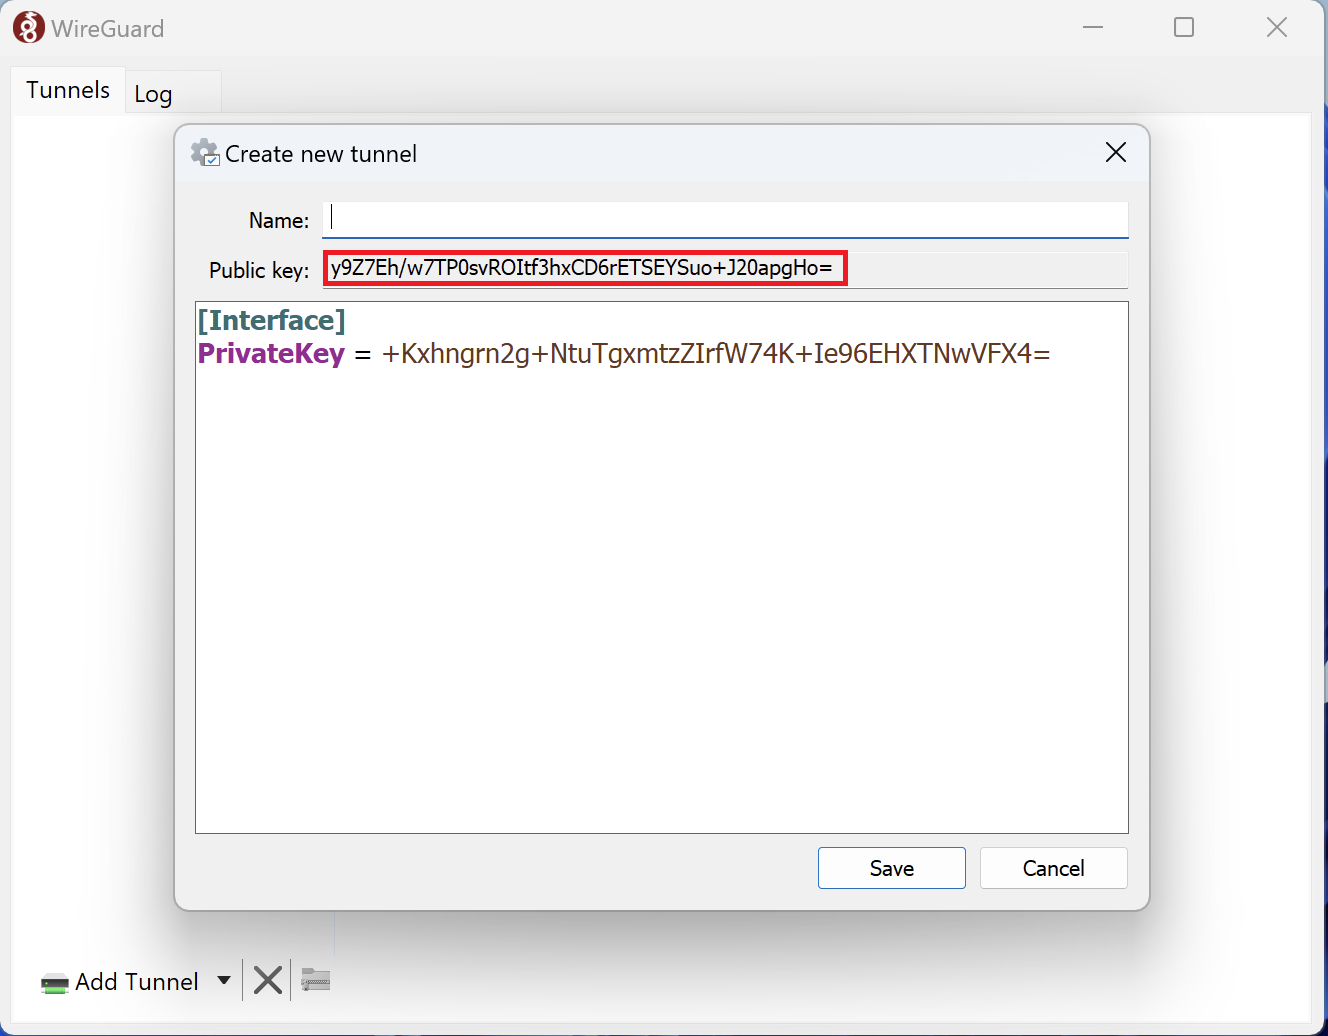
WireGuard operates using a pair of cryptographic keys (public and private) to ensure a secure connection. you will need to copy this public key into the Wireguard Public Key field of the Add Device dialogue box.
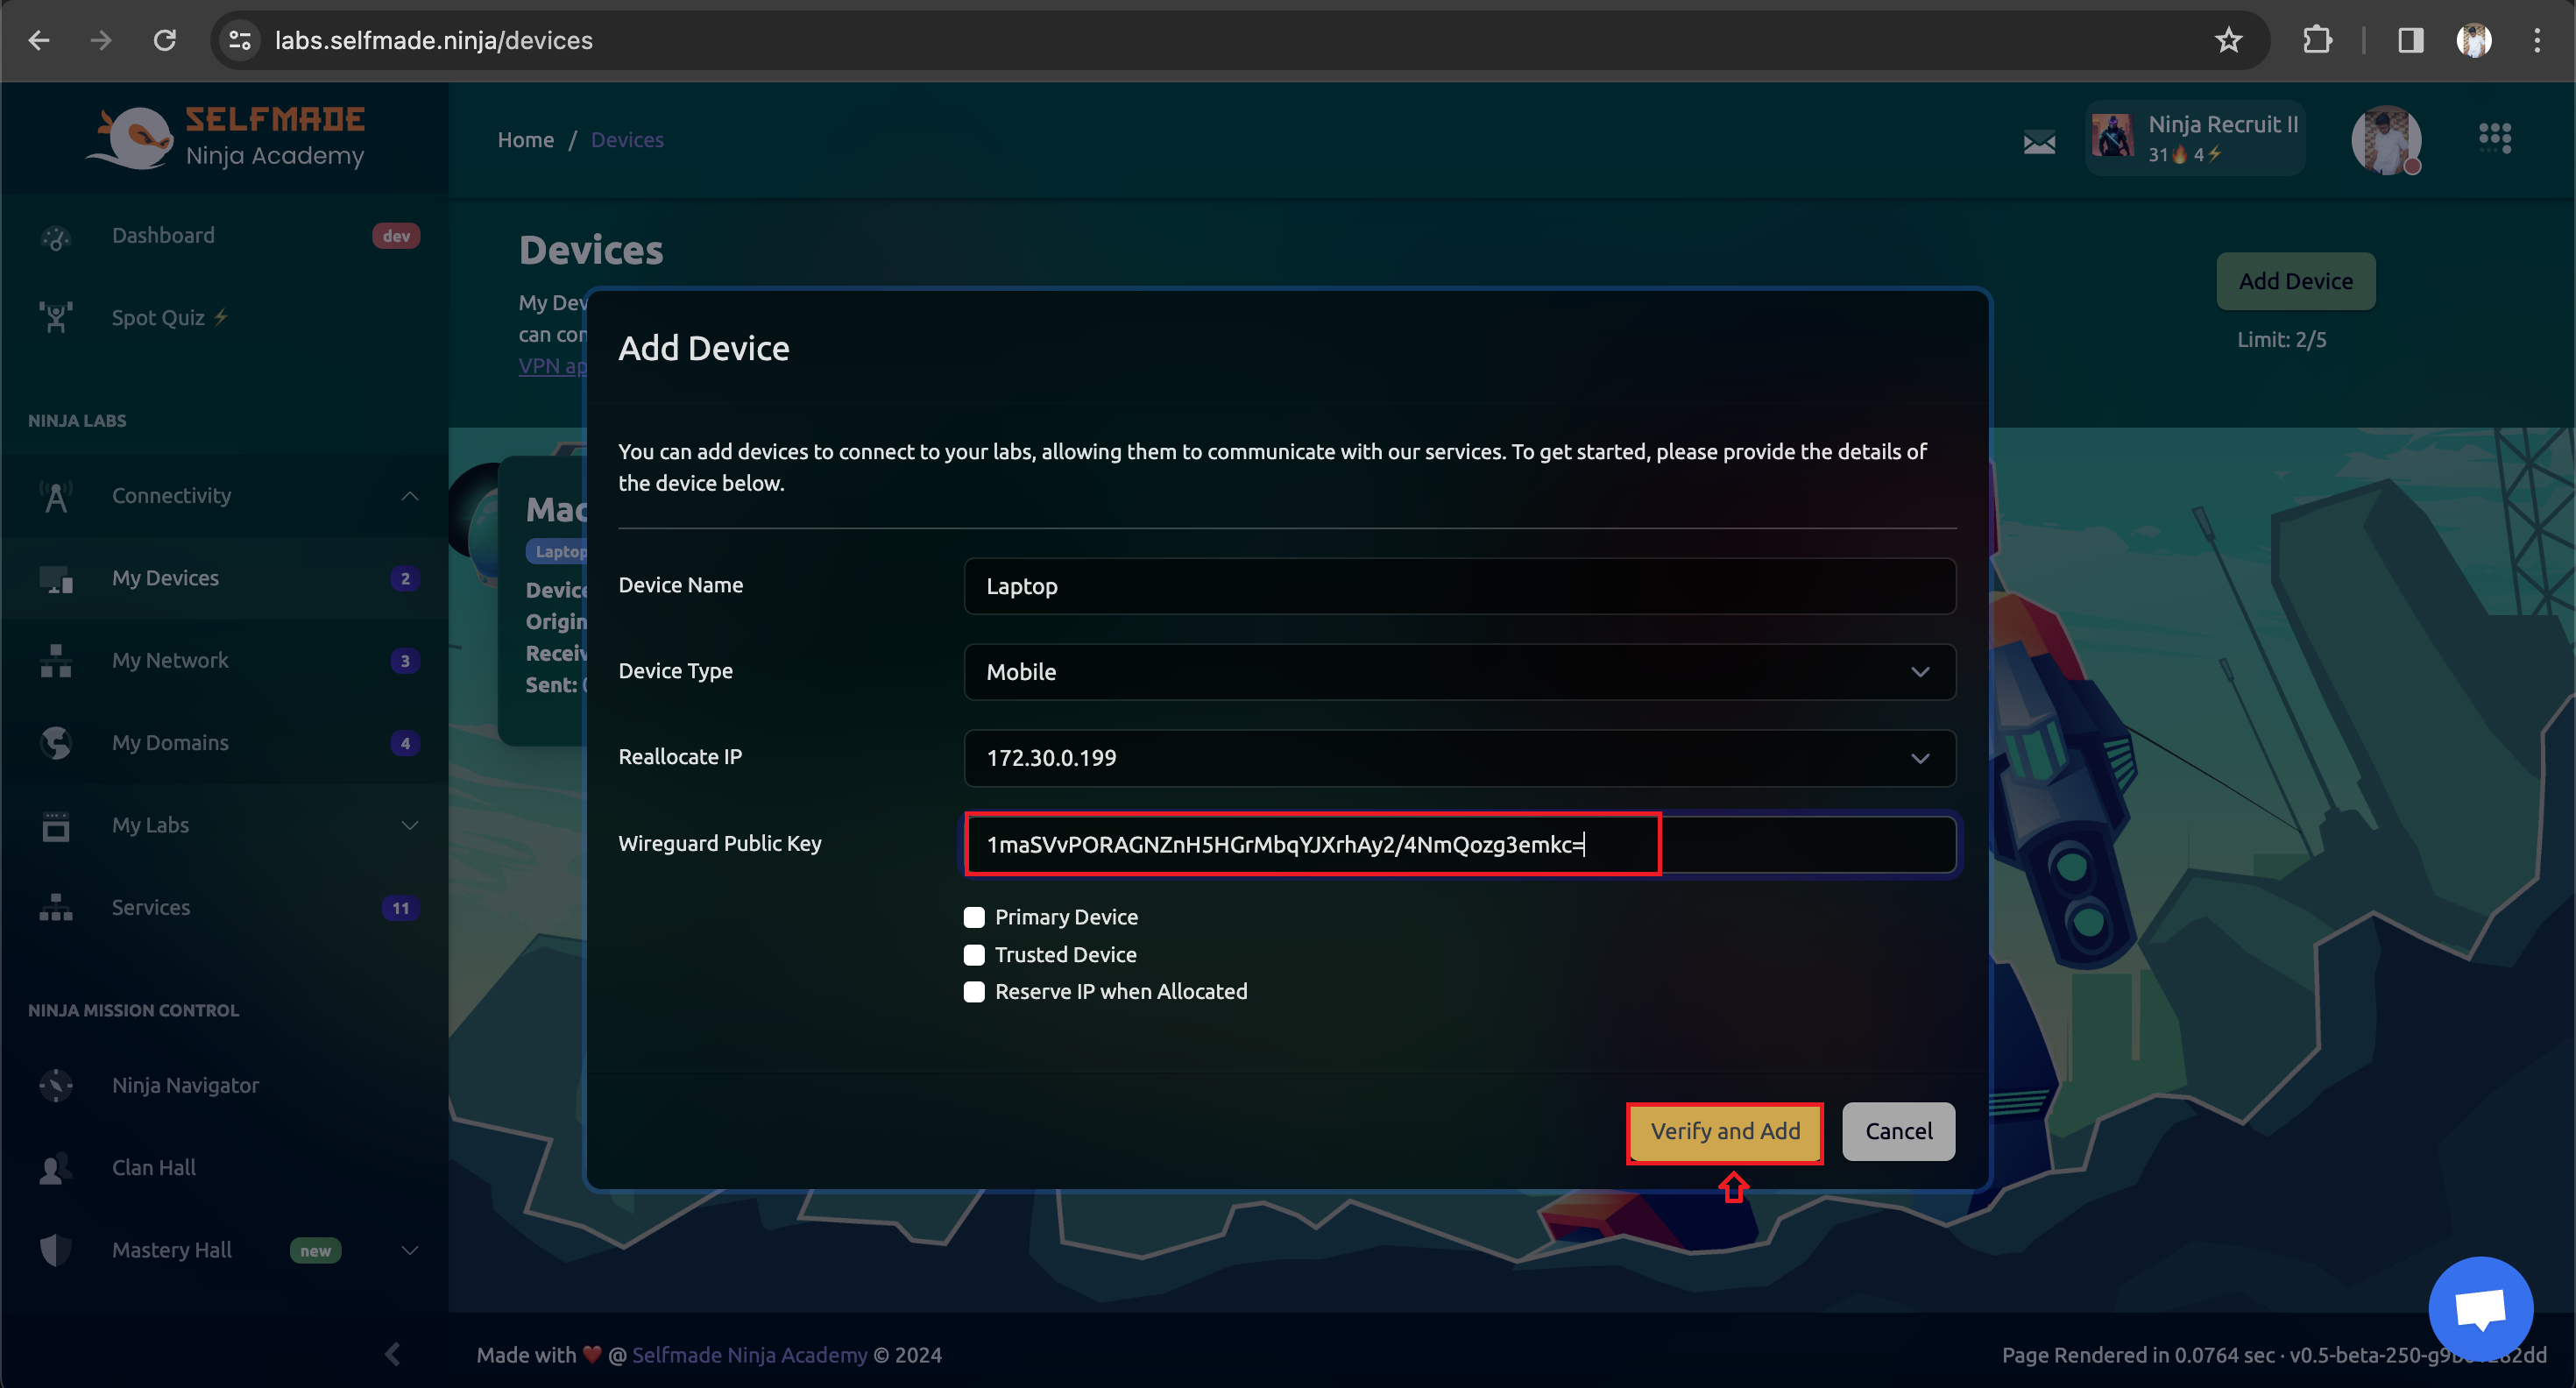
After entering your public key, proceed by clicking on the ‘Verify and add’ option. This action adds the device you've provided, ensuring it's correct and viable for use in setting up a secure tunnel.
With your public key verified and added, the next step involves configuring the tunnel itself. Select your device listed in WireGuard and click on ‘Show Configuration’. This will display the current configuration settings for your tunnel, including the IP address and other relevant details.

Copy all necessary configuration details starting from the ‘Address’ field. These details are critical for ensuring your tunnel correctly routes the traffic to and from your Mac. Paste these settings into the WireGuard configuration section, ensuring every detail matches the configuration.

The final step in the configuration process is to activate the tunnel you've just set up. Click on ‘Activate’ within WireGuard to establish the connection using your new tunnel. This action activates the secure connection, routing your internet traffic through the configured tunnel, effectively securing your online activities.

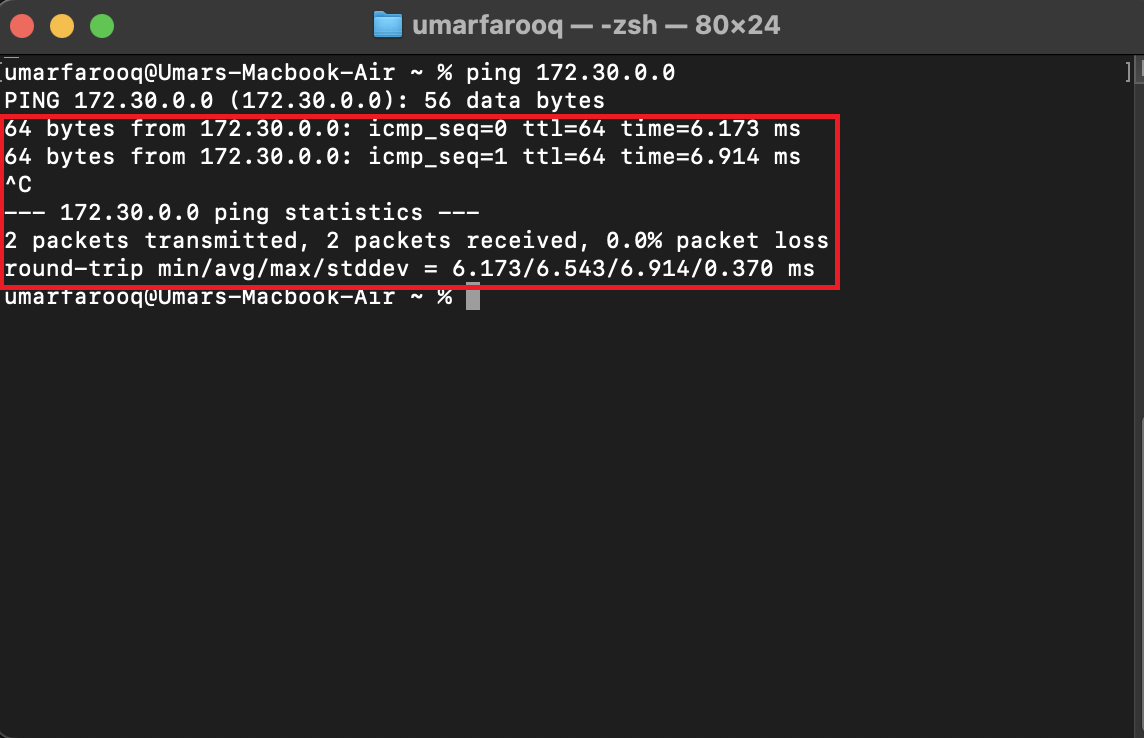
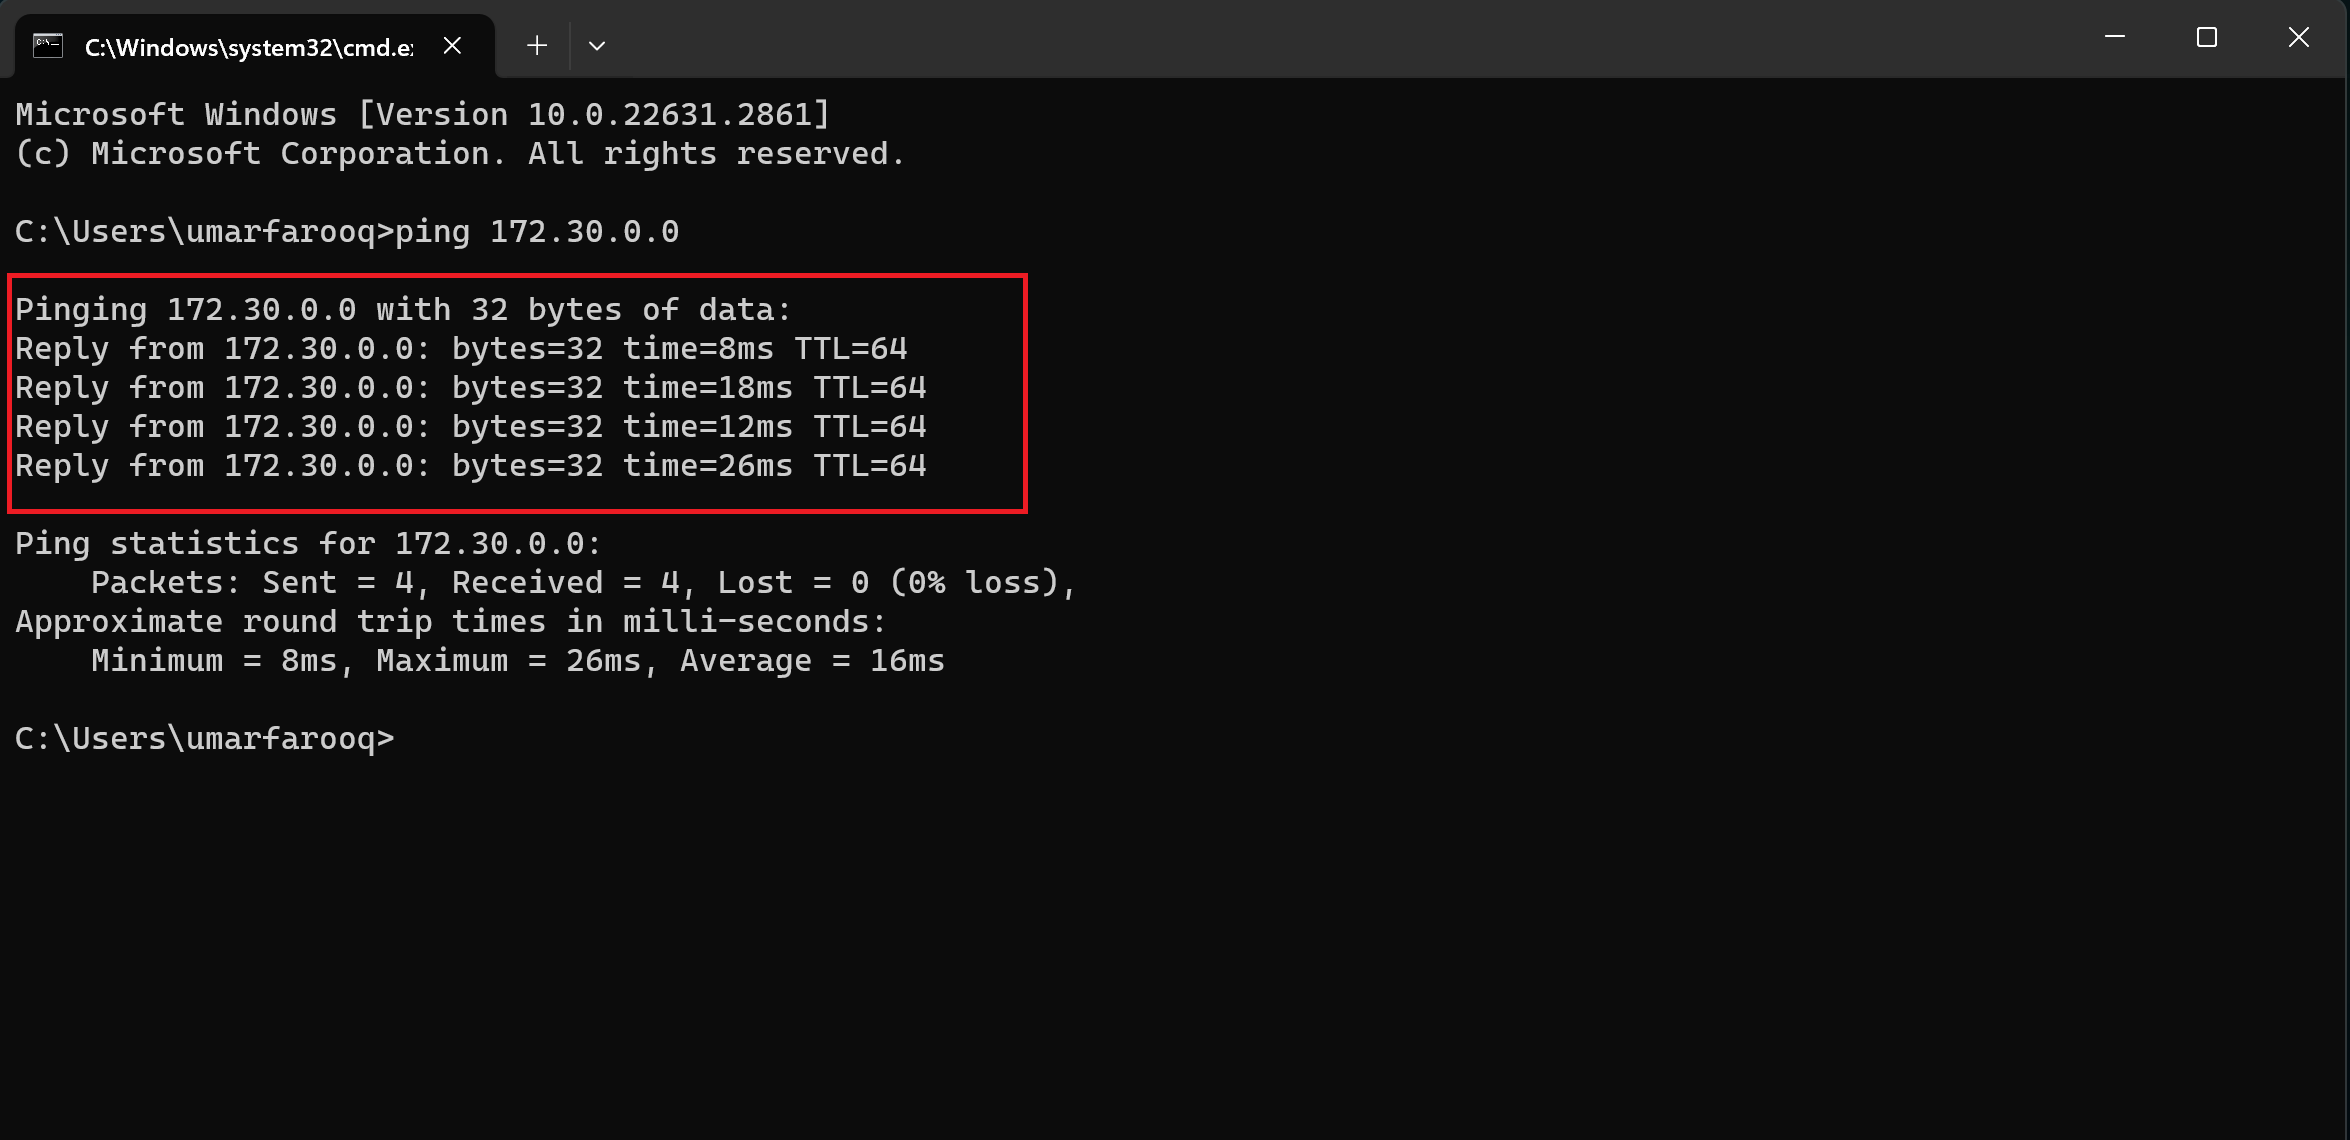
Open your Terminal, type 'ping 172.30.0.0' to check whether the WireGuard connection is working or not. Now you have configured your PC to WireGuard
After installation and login, navigate to the ‘Connectivity’ tab within SNA Labs and select ‘My Devices’. Here, you’ll add your device and configure WireGuard with a public key provided by the platform. This step is essential for establishing a secure, encrypted connection
To generate the WireGuard public key you need first private key so, execute the following command. This command will generate a private key and save it to the file /etc/wireguard/private.key
sudo wg genkey | sudo tee /etc/wireguard/private.key
Next, generate the corresponding public key using the command below. Here, the private key stored in /etc/wireguard/private.key is piped to the wg pubkey command to derive the public key, which is then saved to the file /etc/wireguard/public.key
sudo cat /etc/wireguard/private.key | wg pubkey | sudo tee /etc/wireguard/public.key
After obtaining your public key, proceed by clicking on the ‘Verify and add’ option. This action adds the device you've provided, ensuring it's correct and viable for use in setting up a secure tunnel.
 With your public key verified and added, the next step involves configuring the tunnel itself. Select your device listed in WireGuard and click three dots and select ‘Show Configuration’. This will display the current configuration settings for your tunnel, including the IP address and other relevant details.
 Now, create a new configuration file and insert the following configuration details. Replace the placeholder for the private key with the one you generated earlier
sudo nano /etc/wireguard/wg0.conf
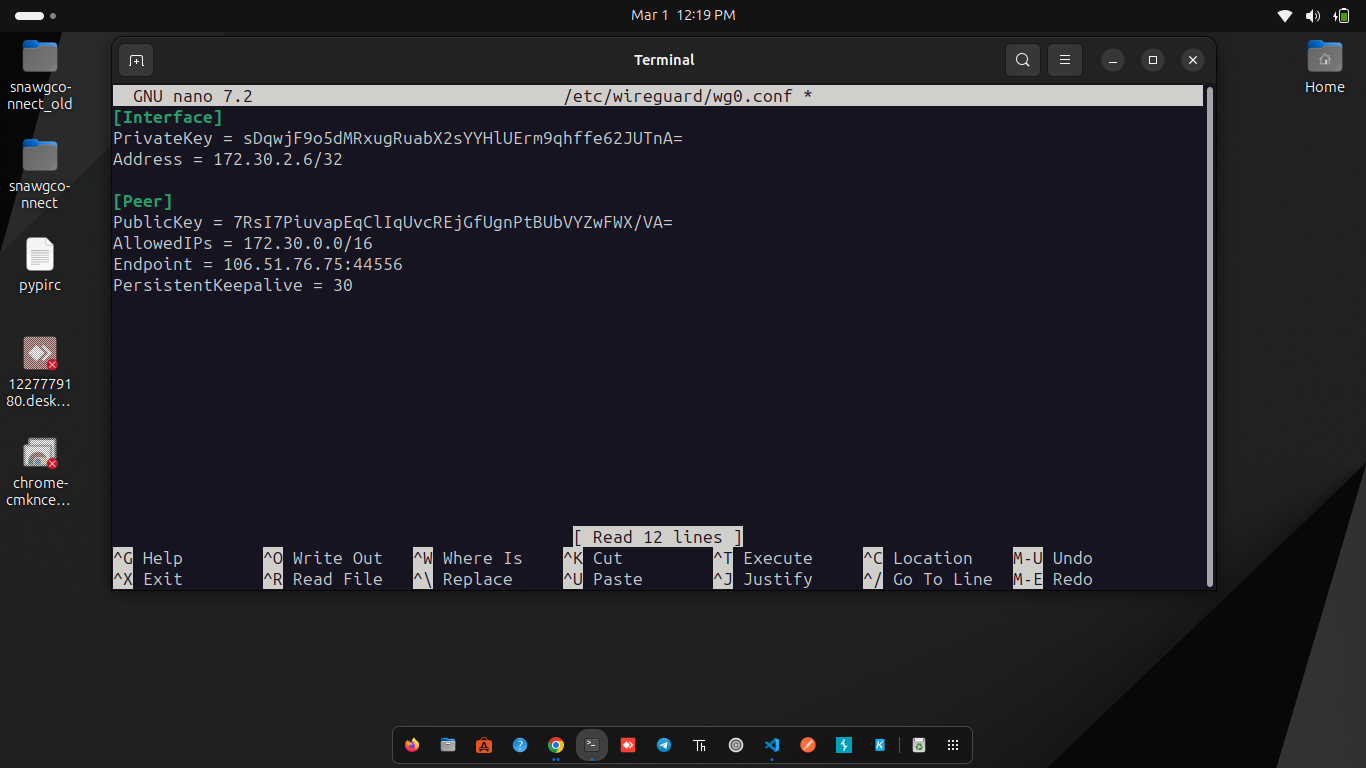 Once the file is opened, paste the configuration copied from the labs and replace the placeholder for the private key with the one you generated before
After pasting the configuration, save the file
The final step in the configuration process is to activate the tunnel you've just set up. Type the command below to bring up the WireGuard tunnel, replacing 'confname' with the name of your configuration file
sudo wg-quick up confname
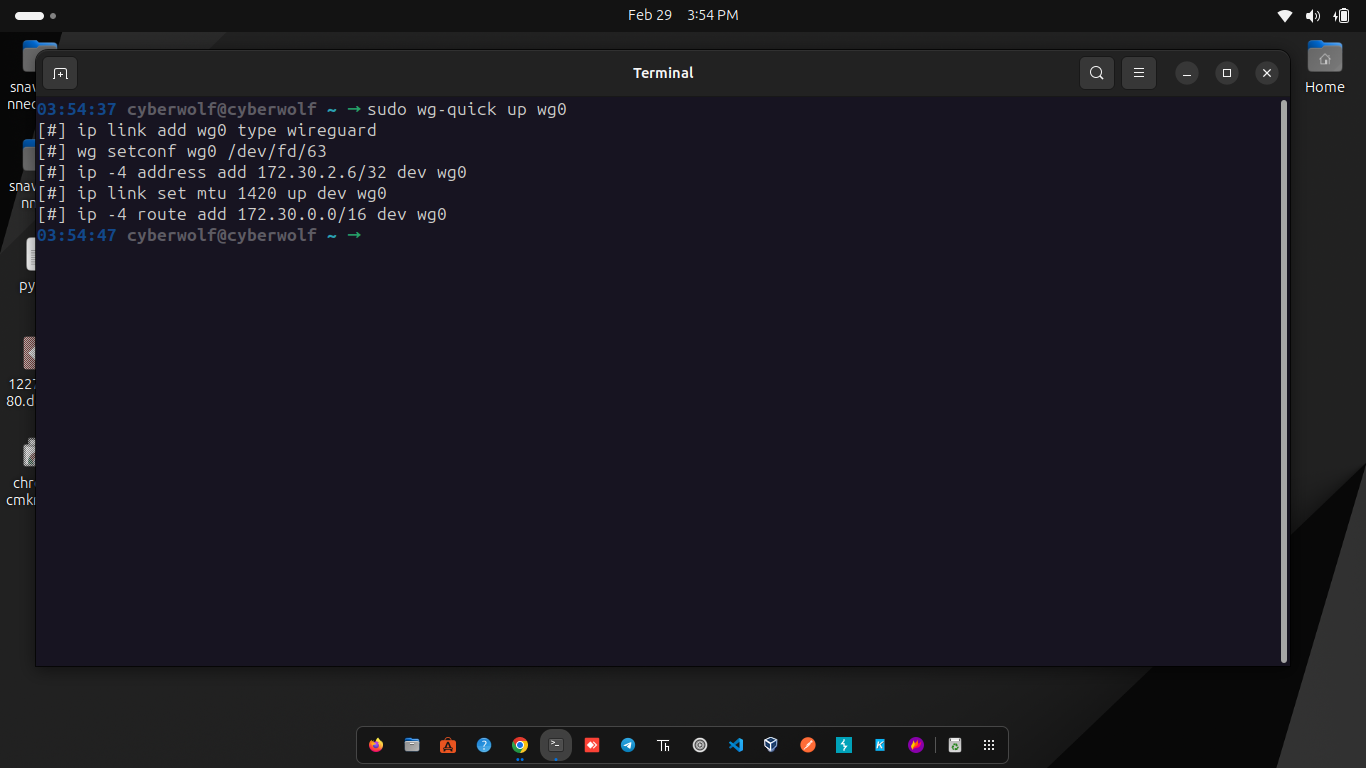 To verify that the tunnel is active, you can use the following command
sudo wg show
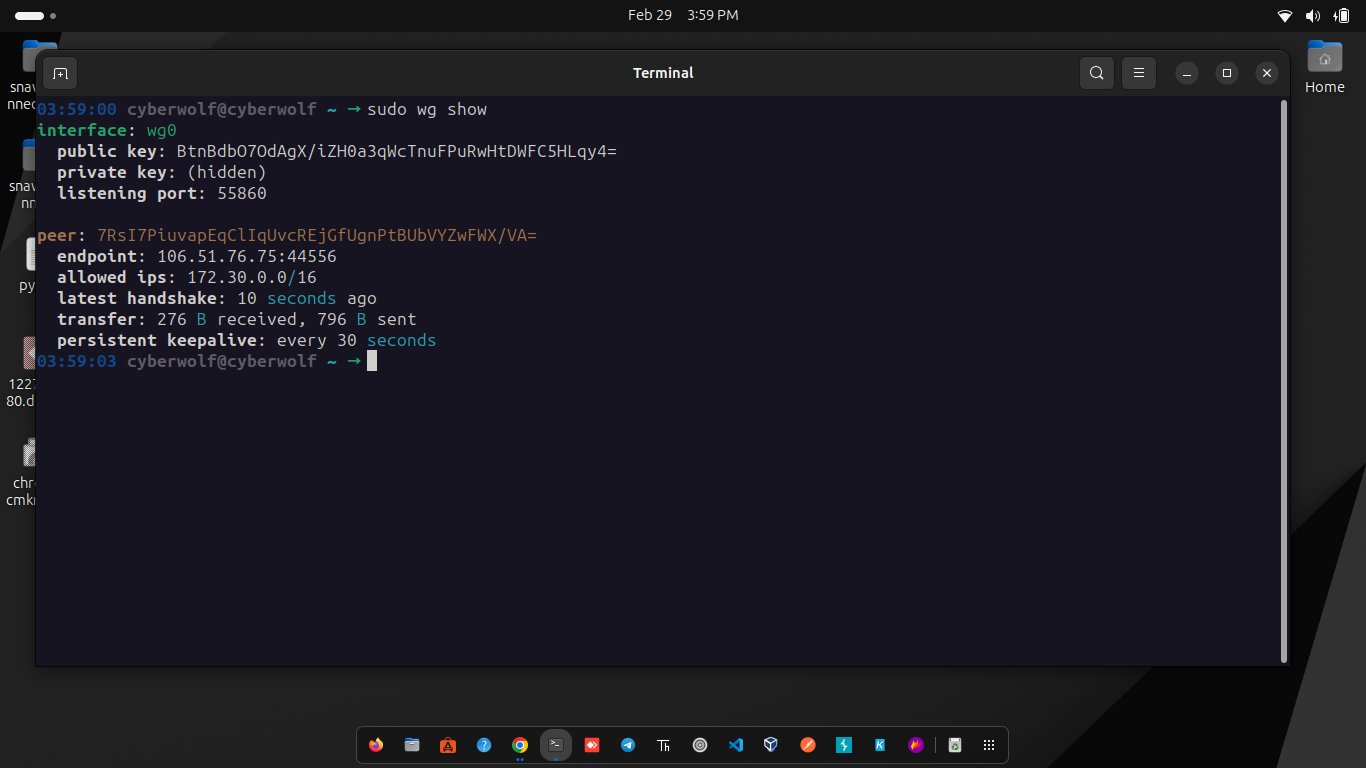 You can also check whether the connection is working by pinging the IP address assigned to the tunnel. Open your terminal and type
 ping 172.30.0.0
With these steps completed, you have successfully configured your PC to use WireGuard for secure communication
After installation and Login , navigate to the ‘Connectivity’ tab within SNA Labs and select ‘My Devices’. Here, you’ll add your device and configure WireGuard with a public key provided by the platform. This step is essential for establishing a secure, encrypted connection.

Begin by opening the WireGuard application on your Mac. Look for the ‘+’ symbol within the app's interface, which signifies the option to add a new connection. Click on ‘Add an empty tunnel’ to start configuring a new secure tunnel for your connection.
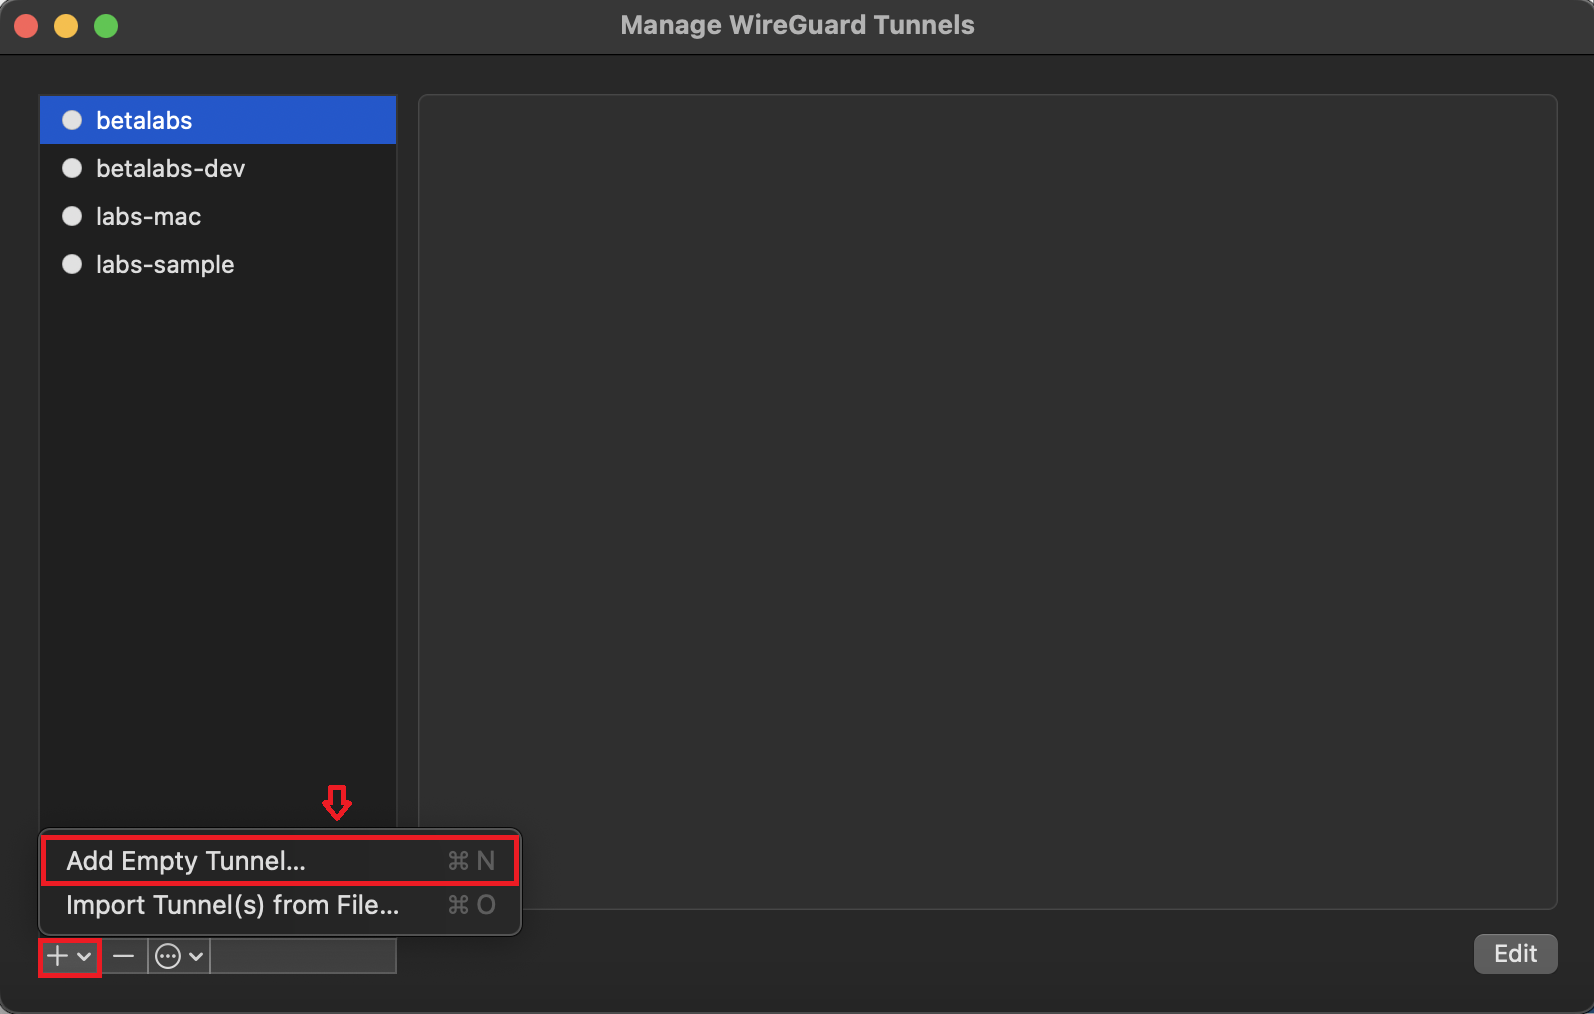
WireGuard operates using a pair of cryptographic keys (public and private) to ensure a secure connection. you will need to copy this public key into the Wireguard Public Key field of the Add Device dialogue box.

After entering your public key, proceed by clicking on the ‘Verify and add’ option. This action adds the device you've provided, ensuring it's correct and viable for use in setting up a secure tunnel.

With your public key verified and added, the next step involves configuring the tunnel itself. Select your device listed in WireGuard and click on ‘Show Configuration’. This will display the current configuration settings for your tunnel, including the IP address and other relevant details.

Copy all necessary configuration details starting from the ‘Address’ field. These details are critical for ensuring your tunnel correctly routes the traffic to and from your Mac. Paste these settings into the WireGuard configuration section, ensuring every detail matches the configuration.
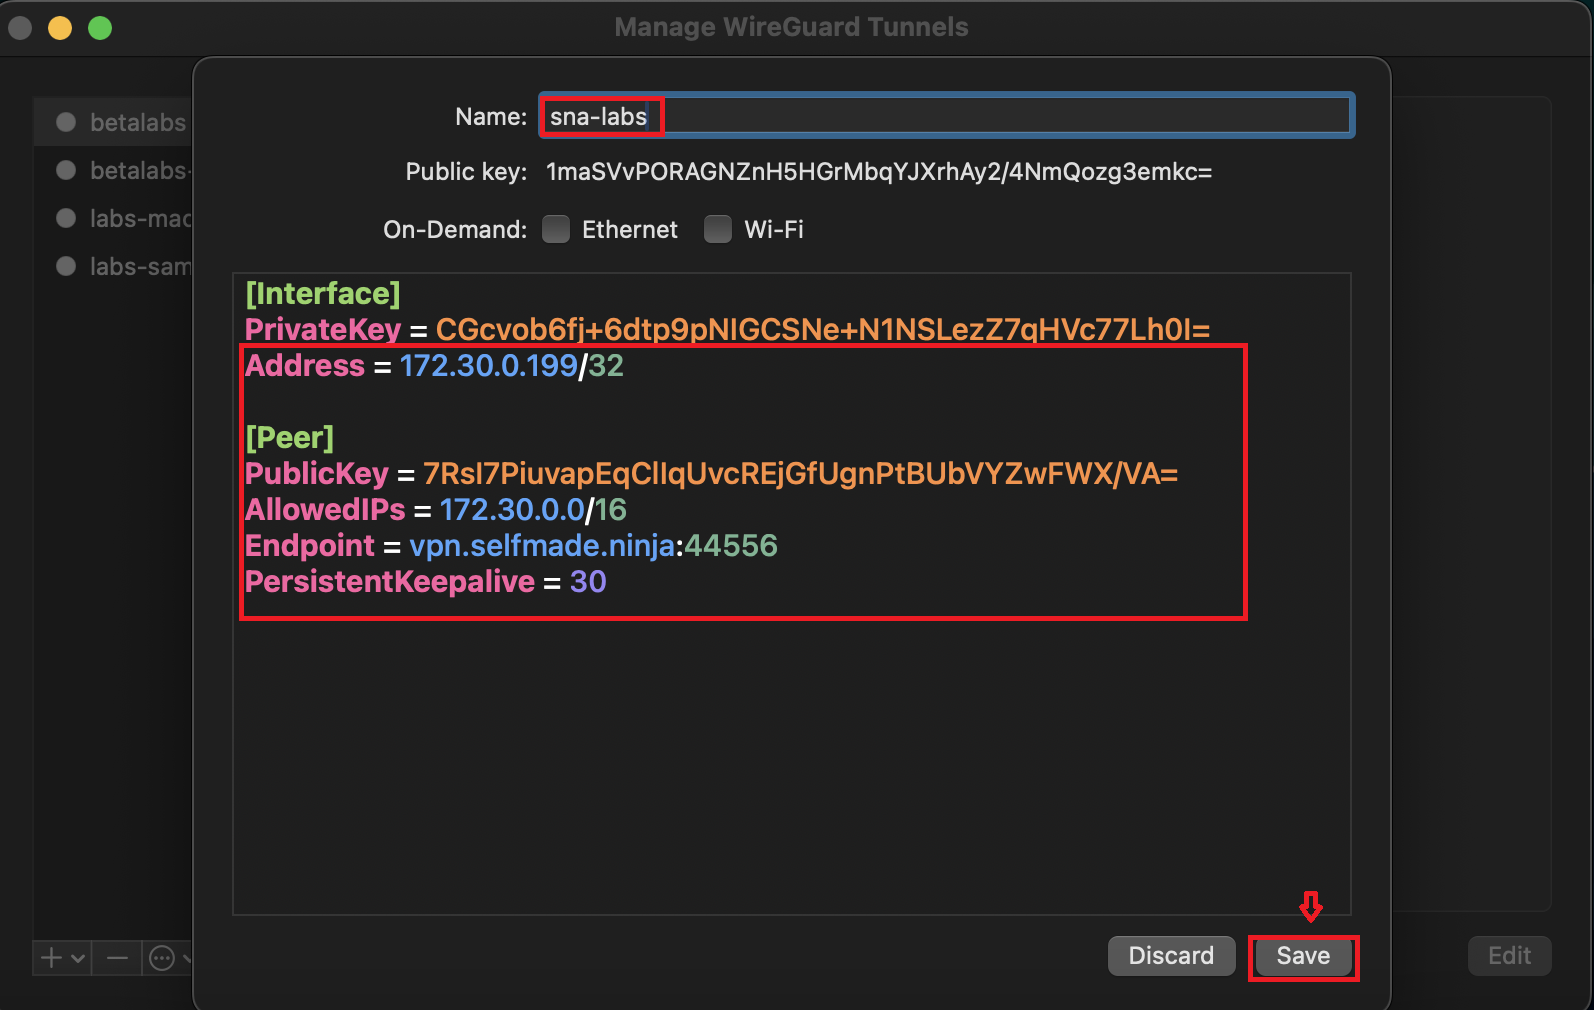
The final step in the configuration process is to activate the tunnel you've just set up. Click on ‘Activate’ within WireGuard to establish the connection using your new tunnel. This action activates the secure connection, routing your internet traffic through the configured tunnel, effectively securing your online activities.
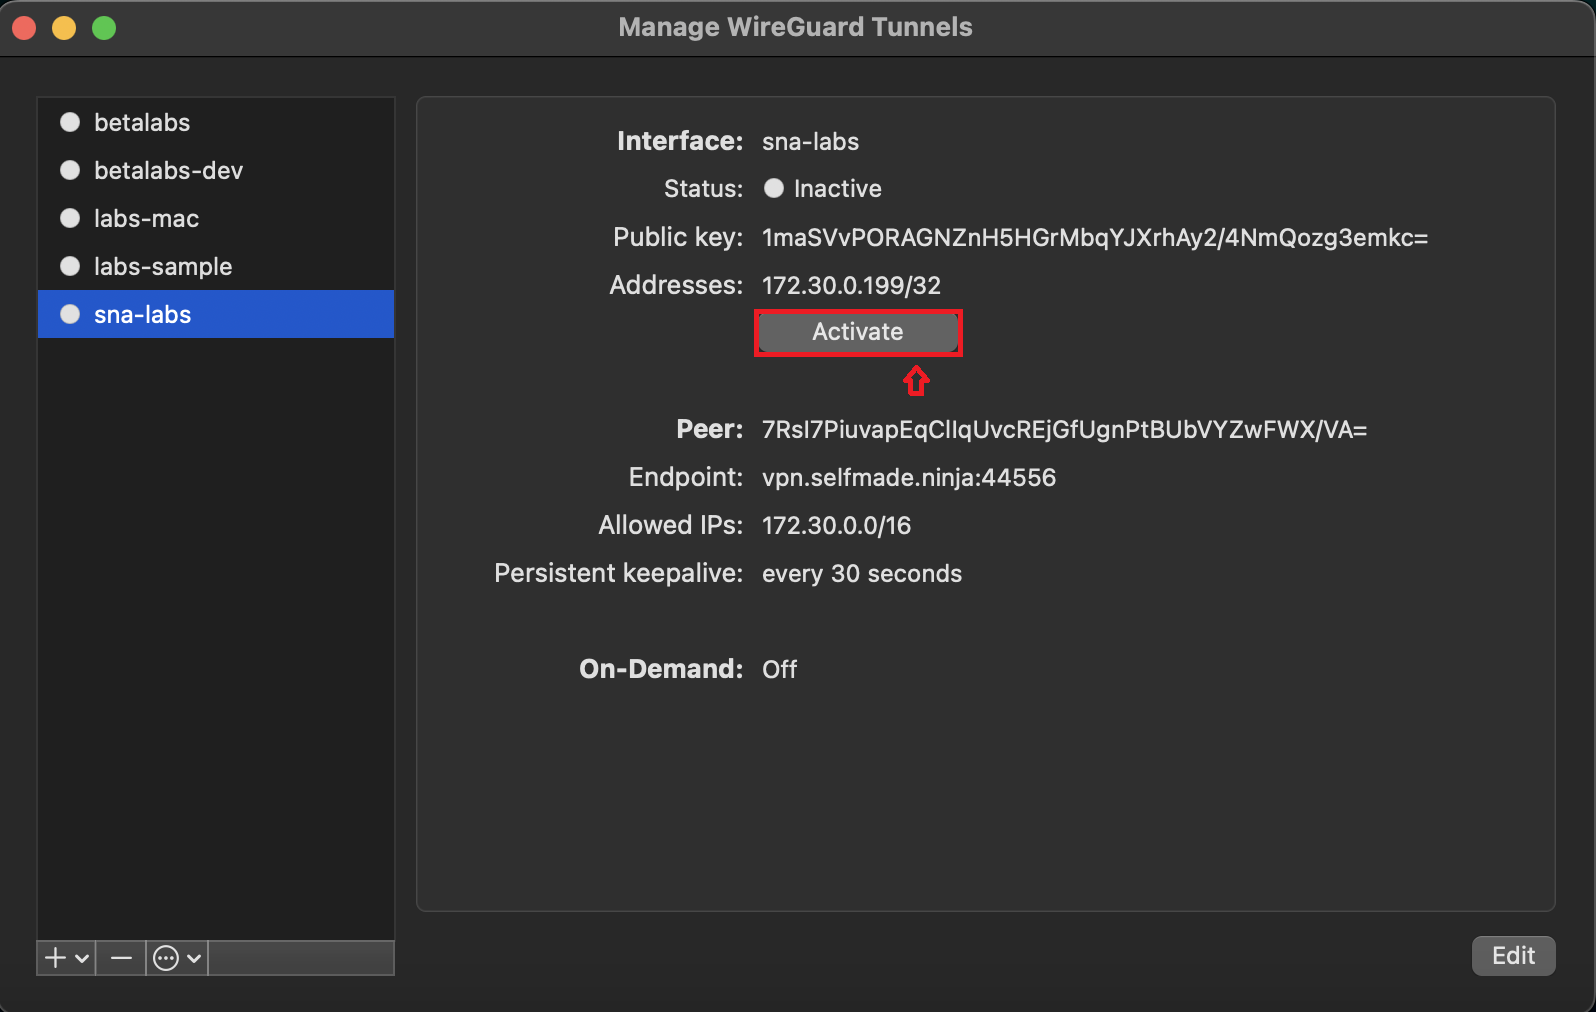
Open your Terminal, type 'ping 172.30.0.0' to check whether the WireGuard connection is working or not. Now you have configured your PC to WireGuard
